# 蝶舞——盆栽艺术
前置知识:
json的语法
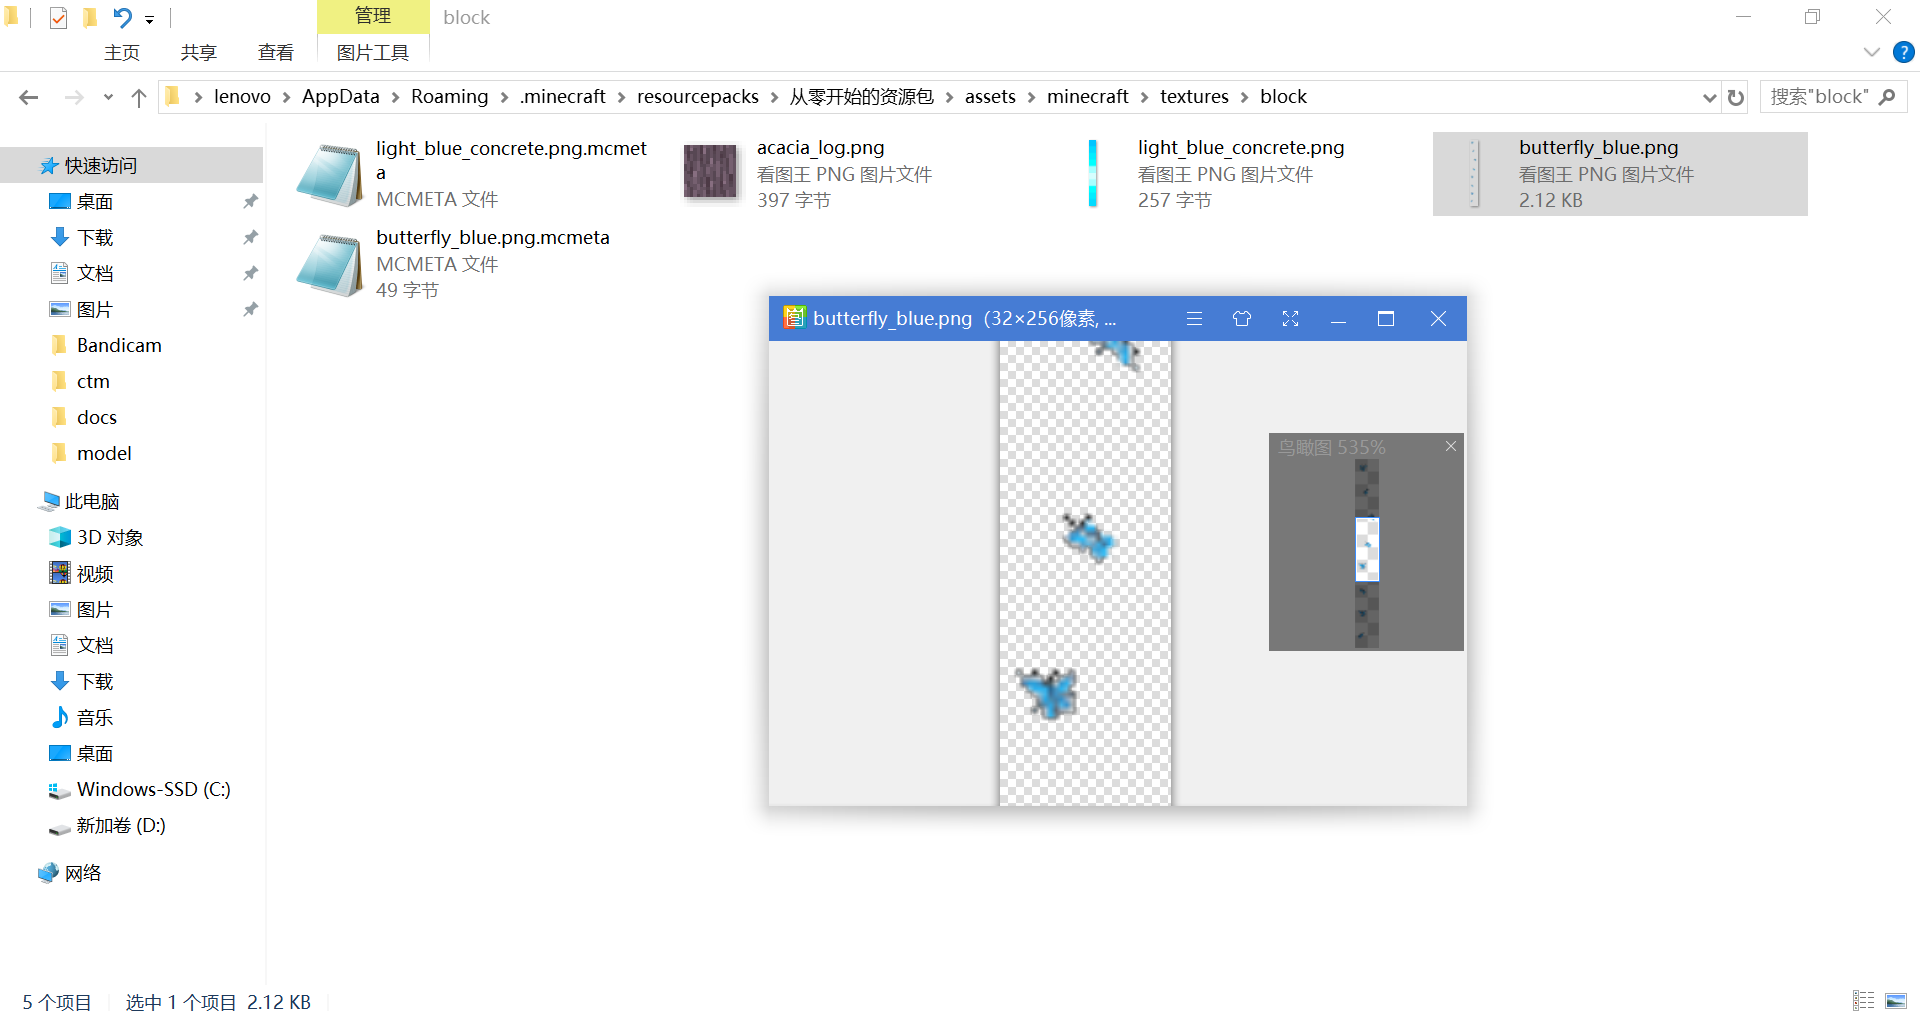
蝴蝶的动态纹理模仿了conquest资源包
我们的目标是制作如下效果:
首先准备好蝴蝶的动态纹理:
本节中我们要试着不使用Blockbench,徒手修改一下模型文件,以加深对模型文件本身的理解。
potted_blue_orchid.json
{
    "parent": "block/flower_pot_cross",
    "textures": {
        "plant": "block/blue_orchid"
    }
}
我们看到兰花盆栽的模型是继承了flower_pot_cross的,要在兰花上添加一对飞舞的蝴蝶,必须要修改flower_pot_cross.json。修改思路是把花盆中的花的模型复制一份,向上平移一段距离。
因为我们只想修改兰花盆栽,为了避免影响到其他盆栽,我们将文件复制一份,改个名叫flower_pot_butterfly.json,并令potted_blue_orchid继承flower_pot_butterfly。
flower_pot_butterfly.json
{
    "ambientocclusion": false,
    "textures": {
        "particle": "block/flower_pot",
        "flowerpot": "block/flower_pot",
        "dirt": "block/dirt"
    },
    "elements": [
        ...
        {
            "from": [ 2.6, 4, 8 ],
            "to": [ 13.4, 16, 8 ],
            "rotation": { "origin": [ 8, 8, 8 ], "axis": "y", "angle": 45, "rescale": true },
            "faces": {
                "north": { "uv": [ 0, 0, 16, 16 ], "texture": "#plant" },
                "south": { "uv": [ 0, 0, 16, 16 ], "texture": "#plant" }
            }
        },
        {
            "from": [ 8, 4, 2.6 ],
            "to": [ 8, 16, 13.4 ],
            "rotation": { "origin": [ 8, 8, 8 ], "axis": "y", "angle": 45, "rescale": true },
            "faces": {
                "west": { "uv": [ 0, 0, 16, 16 ], "texture": "#plant" },
                "east": { "uv": [ 0, 0, 16, 16 ], "texture": "#plant" }
            }
        }
    ]
}
忽略我们不需要修改的部分,我们注意到最后两个element的纹理为#plant,而且绕y轴的旋转角度都是45度,表明它们是盆栽中花的交叉模型。
于是我们复制这两个element,粘贴到后边,接下来只展示这两个element的代码:
{
	"from": [ 2.6, 4, 8 ],
	"to": [ 13.4, 16, 8 ],
	"rotation": { "origin": [ 8, 8, 8 ], "axis": "y", "angle": 45, "rescale": true },
	"faces": {
		"north": { "uv": [ 0, 0, 16, 16 ], "texture": "#plant" },
		"south": { "uv": [ 0, 0, 16, 16 ], "texture": "#plant" }
	}
},
{
	"from": [ 8, 4, 2.6 ],
	"to": [ 8, 16, 13.4 ],
	"rotation": { "origin": [ 8, 8, 8 ], "axis": "y", "angle": 45, "rescale": true },
	"faces": {
		"west": { "uv": [ 0, 0, 16, 16 ], "texture": "#plant" },
		"east": { "uv": [ 0, 0, 16, 16 ], "texture": "#plant" }
	}
}
首先我们希望它使用与盆栽里的植物不同的纹理,所以将"#plant"更改为"#butterfly"。
此外,"from"和"to"表示了三维空间中的一对坐标,要修改y轴坐标的值,让模型向上移动。我们先移动6个像素,看看情况。
于是我们把这两个元素修改成这样:
{
	"from": [ 2.6, 10, 8 ],
	"to": [ 13.4, 22, 8 ],
	"rotation": { "origin": [ 8, 8, 8 ], "axis": "y", "angle": 45, "rescale": true },
	"faces": {
		"north": { "uv": [ 0, 0, 16, 16 ], "texture": "#butterfly" },
		"south": { "uv": [ 0, 0, 16, 16 ], "texture": "#butterfly" }
	}
},
{
	"from": [ 8, 10, 2.6 ],
	"to": [ 8, 22, 13.4 ],
	"rotation": { "origin": [ 8, 8, 8 ], "axis": "y", "angle": 45, "rescale": true },
	"faces": {
		"west": { "uv": [ 0, 0, 16, 16 ], "texture": "#butterfly" },
		"east": { "uv": [ 0, 0, 16, 16 ], "texture": "#butterfly" }
	}
}
回到 potted_blue_orchid.json
{
    "parent": "block/flower_pot_butterfly",
    "textures": {
        "plant": "block/blue_orchid",
		"butterfly": "block/butterfly_blue"
    }
}
进入游戏查看效果:
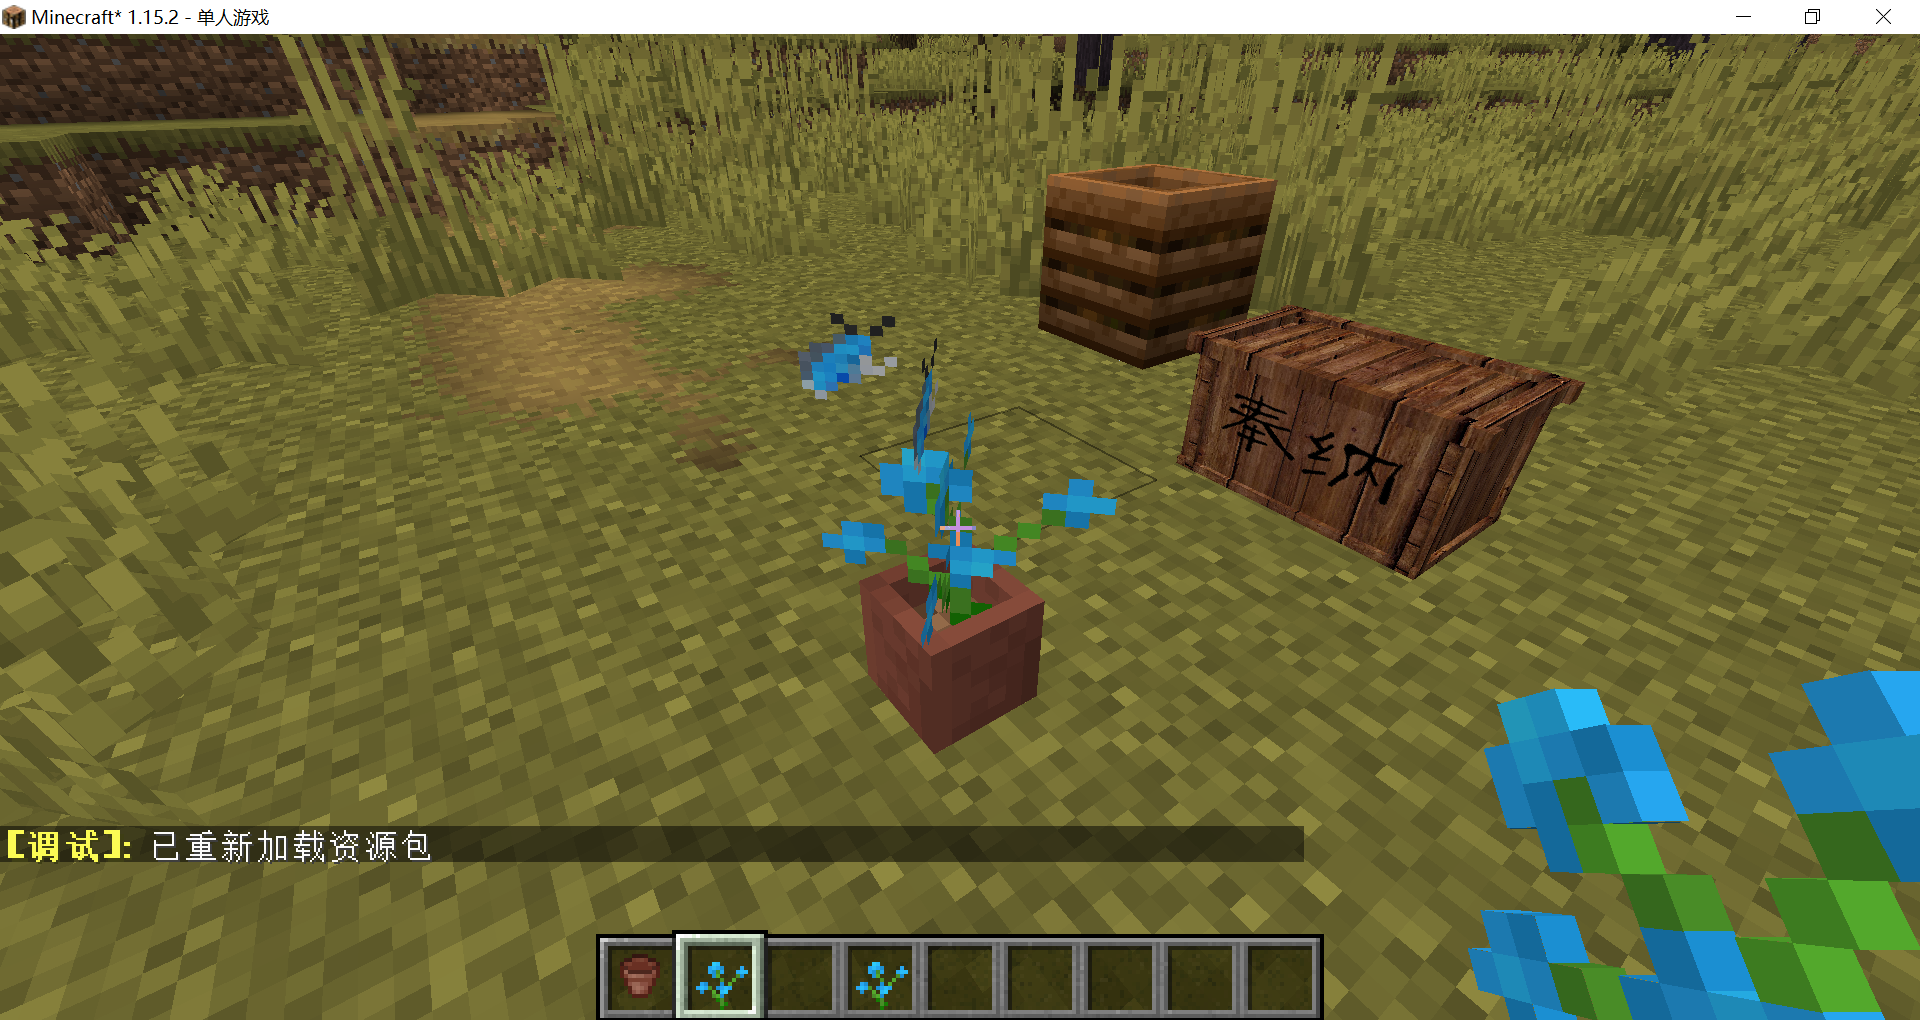
完成!
提示
花盆曾经是方块实体,每种类型的盆栽对应一种方块状态,在1.13扁平化更新中被拆分成了许多独立的方块。
← 物品标签——添加更多物品 额外的资源文件 →